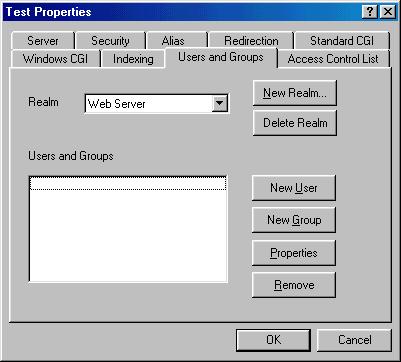
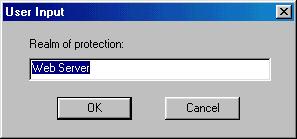
If you haven't done this before, OmniHTTPd will create the realm 'Web Server' for you. A realm is simply a set of users and groups. Most users only need one realm. If you like, you can make your own realm and call it whatever you want. For this example, we will just use the default one.
Press the 'New User' button.
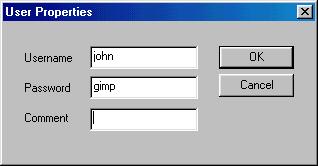
User names and password are case sensitive and may contain spaces. The comment field is for your own information. Press OK. A user entry will appear in the list.
This is where you enter paths that you wish to protect. Access is protected by URL and is done on a best-match system. This means that when OmniHTTPd gets a request, it will go through this list and find the best matching path and use the security in that path to screen the URL.
Press the 'New' button.

The OmniHTTPd path system is very flexible and will allow the protection of any path, file or path fragment. For example, /secret/ will protect /sercet/stuff and /secret/stuff/for/me.gif. Notice the leading and trailing slash. By default, if no paths are specified, read access is granted.
Specify the realm that you wish to use to protect this path. Recall that a realm is a set of users and groups.

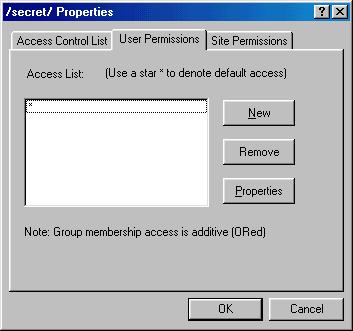
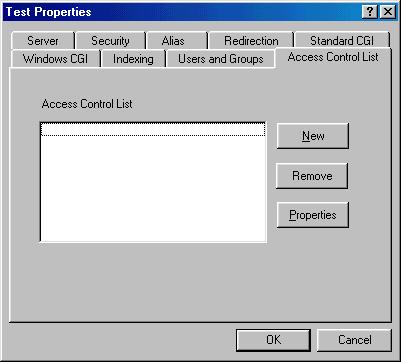
This is the list of users and groups that have access defined. Notice that there is a '*' entry. This entry is the default access definition. You can remove this entry if you want. If OmniHTTPd cannot find a user in this list when screening the URL, it will deny access by default. Double-click on the '*' entry.
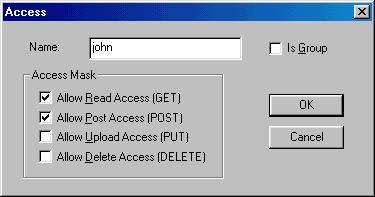
This will deny everyone access to the path except for our user john. Notice that OmniHTTPd allows very specific definitions for access. If john is a group name (which is it not in the case) you must check the 'Is Group' check box. OmniHTTPd does not currently cross-verify your information. Note, however, that you can have both a group named john and a user name john in the same realm.
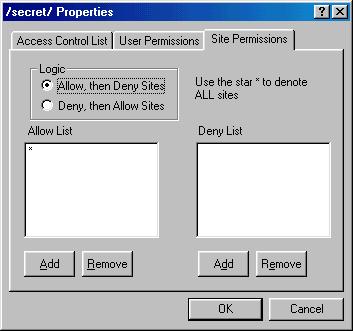
Congratulations, you are finished setting up the security. Let's just look at the site restrictions out of curiousity. Notice that there is also a '*' entry in the allow list. This means to allow people from all IP addresses.
Recall the 'Logically OR User and Site Permissions for this Path' check box from the 'Access Control List' sheet. Since this option is unchecked, the user must be john but he can access from anywhere. If that option was checked, OmniHTTPd would never ask for a password because all access would satisfy the Site Permissions.
OmniHTTPd allows both name, name fragments, IP and IP fragments. For example, '.domain.com' would mean everyone from the domain 'domain.com'. '10.0.0.' would mean everyone from '10.0.0.0' to '10.0.0.255'. Note that in order to restrict by site name (as opposed to IP), client reverse DNS resolution must be turned on.